Hello, welcome to Homemade Home, where we share our ideas for decorating, crafting, sewing, and using a little creativity to save some dough!

Showing posts with label Decorating. Show all posts

Monday, September 15, 2014

Painted Frame Art - Girls' Room


I'm happy with how my daughter's room looks now that I completed their main wall with painted solid shapes and simple profiles of them.
The main reasons I did this project were:
1) I already had painted the left shape on the wall back when this was my youngest daughter's baby room and I didn't want to paint the whole wall to cover it up now that it wasn't centered over a crib.
2) Because this wall is over my daughter's bed, I didn't want anything heavy or potentially dangerous hanging on the wall.
3) I wanted something that would combine something personal for both girls and celebrate their sisterhood.


 This project wasn't very hard. The most time-consuming part was painting 3-4 layers of the pink paint for each shape. I designed the shapes using a yard stick, pencil, a level, a drinking cup to trace the scallops, a sheet of computer paper to create a template for 1/4 of my oval and a large piece of cardboard folded in half to cut out a stencil for the left shape (what is that shape called??).
Once the shapes where sketched with pencil on the wall, I painted them with pink paint using a medium size, high density foam brush.


I created the silhouettes of my daughters by taking their photo, putting the digital photo in a Word document with the margins as small as possible and the photo as large as possible, printing it, cutting out the silhouette how I wanted it and then tracing it with a box cutter into white contact paper. It was pretty fast and easy this way. I used my Silhouette craft cutter to make the "and" also out of cheap contact paper. The contact paper is staying up on the slightly textured wall very well. I am curious to see how long it stays tight to the wall and looking bright and clean. The girls have been commanded not to touch them!


Thursday, July 11, 2013

Little Touch of Happy Yellow

It may sound odd, but this is the first time I have painted a color on my walls in my home! My husband has been opposed to me painting walls colors. He's all about white walls for some reason. I've gotten used to that idea, although at first I was a bit shocked that he even had an opinion on the matter. Growing up, my dad never cared, at least I never saw him disliking all my mom's decorating and painting. 
Anyway, back to my color! Just a little space, but I love the color it brings to my ever-improving kitchen!


I mixed my own color of yellow using two paints I already had. One was Clarks & Kensington Spun Gold (flat) from a free paint Saturday at Ace a while back. The other was the cabinet color (Royal Southern Plantation, satin finish). I tested out the color on a little spot for a day (see below) and then ended up adding a lot more of the off-white to ease it up a bit. I didn't want it too overbearing. 
I am really enjoying it! 


Next up... installing the knobs and pulls that I purchased!

~ Chelsea ~

More about my kitchen project HERE and HERE.

Monday, July 1, 2013

Fabric Scrap Garland - Red, White & Blue


Another successful decoration made with everything I already had (and some fabric donations from my mom's stash). There are even some cut off jeans and old t-shirts in there! I used some hemp string that I had in my jewelry making box and my pinking rotary blade to cut the fabric strips with ease. Quick, easy, free and patriotic. 


If you want to make some garland for any occasion, just cut strips of fabric about 1-2 inches thick and however long you desire (mine ranged from 5-8 inches, I didn't measure anything). Then, do a single simple knot around a sturdy string in the order you desire. Can't get any easier!
Have fun celebrating the USA this week!


Tuesday, June 25, 2013

Celebrate America!

I'm feeling extra patriotic this year and I'm very excited for Independence Day next week.
I've been trying to come up with a decoration for my front door. I looked around the craft store and some of my favorite crafty blogs for inspiration, but I didn't see anything that I had time for or already had at least most of the materials for. I really should be banned from buying any additional crafty supplies until after I use what I have! 
So, I decided to use a scrap of bead board from my recent kitchen project, a contact paper stencil created by me and my Silhouette machine, paint and a strip of fabric that I had in my stashes.
Here's what I came up with:


Have I ever said that I love bead board!?
I do. 
And I also love my country and I pray that God can continue to be the leader of it as we allow Him.

~ Chelsea ~

Monday, June 10, 2013

Kitchen Cabinets - Making Progess!


I'm getting excited as my kitchen cabinet project begins again after a long break. Let me fill you in on the story of my kitchen cabinets. 

Beginning of December 2012, I aqcuired some cabinets that would fill a vision I have had for the dining room side of my kitchen. I never liked looking at the bare back side of the kitchen cabinets, and I thought it would be great to have additional cabinet space in this area. My dad helped that vision come true by installing the cabinets after much preparation, measuring and spacing. 


As you can see, the process of installing these extra cabinets was far from simple. It required demolition, supports in the attic/crawl space, drywall repair, spacing between the upper cabinets, creation of a toe-kick riser for the lower cabinets and much energy and time. I was immediately in love with my new cabinets, although, they have sat looking un-finished for nearly half a year.

Here's a view of the kitchen a few months back.


And the unfinished ends that have been staring at us for too long...


I primed and painted the top new cabinets back in March, but they are still in need of a final coat. The others have been waiting...
...until this past Saturday when we caught the vision again!

I began on Friday deep cleaning all the cabinets with TSP and taking off the cabinet doors on the top (since my little girls would be around I didn't want the bottom ones off).
Then Saturday morning, I primed the "bones" of the top cabinets and the trim.
I used both brush and small roller.

Here's a photo of the priming process...


And here's that hideous end, waiting for my favorite part!!!


Bead Board!!!


I'm so happy with how the bead board looks, even un-finished. 
This week I'm hoping to wrap up this kitchen project!

- Spackling, light touch-up sanding and caulking today.
- Full day of priming and painting tomorrow (grandma is taking the girls, hooray!).
- Replacing all the doors and drawers.
- Putting new bumpers on the insides of doors and drawers.
- I'm hoping to find a great deal on some hardware to give a finishing touch.

I'm looking forward to seeing the fruit of the labors of many, especially my dad, in this kitchen project!

Wednesday, June 5, 2013

Painting Frames

There is no better way to surround a photo or give a gift than to save money and use your own time and talents to recreate beauty. A thrift store frame plus a little time and creativity (and paint) makes a unique, original gift and a frame just the way you want it. 
I painted this frame for my mum this past Mother's Day. 
I almost forgot the before picture. 


Light blue first:


Then I used a wet paper towel to add some white paint. I rubbed it on and then rubbed it off hard to give it a white-washed, slightly distressed look. 


I got the frame nearly free at a thrift store, then chose I color of paint from my stash that I thought she would like. It looked great with a photo of her four children in it, taken by my sister.

Save money and have fun recreating a frame from a thrift store!

~ Chelsea ~

Monday, April 29, 2013

Pretty Vases made out of Jars

Using a variety of jars and adding touches of ribbons, fabric & trims is a wonderful way to recycle & repurpose.
 It is probably the last time for these pretty sweet peas now that the temperature has risen.
They came from one of our neighbors beautiful yards.
 They certainly added colorful beauty on our table for a very special occasion.
 Our Grand Daughters birthday dinner!

 ~*~Lynda~*~

Saturday, February 9, 2013

Can you feel the LOVE?

I just want to share some LOVE with you!

 Bling in a bow!!!!
 These are really special 'heart' flowers that 2 of our Grandcuties made for us last year. Love them!
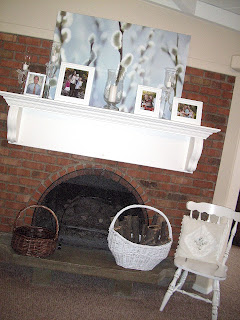
 On our mantle are pictures of our 4 kids and their families! We love them all dearly!
 These gorgeous stemmed candle holders are from some dear friends in Austria! I found some old 'heart' bracelets to attach to them with a pretty bow.

 Triple the love! I just put this together with some things I already had on hand.
 I hope you feel the love, by giving love to all! Even yourself!
With Love, ~*~Lynda~*~